Outlook 2010 Email Setup
This tutorial shows how to configure your email account in Outlook 2010. yourdomain.com and info@yourdomain.com are used as examples. Please follow these steps replacing yourdomain.com with your actual domain name and info@yourdomain.com with your actual email account. If your Internet Service Provider (ISP) is Telstra BigPond, please consider the post “BigPond Outgoing Mail Server” when completing steps 6, 7 and 9 of this tutorial.
Outlook 2010 Email Setup Tutorial
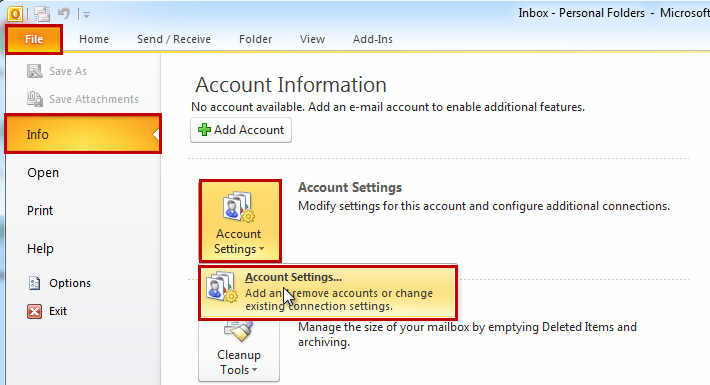
- Open Outlook 2010 and click on File, then Info.
- Select Account Settings, then Add and remove accounts or change existing connection settings. from the drop down.
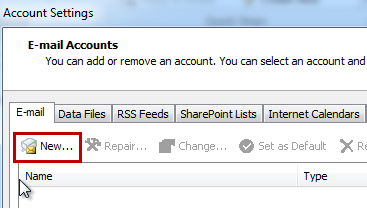
- Select the E-mail tab (normally selected by default), then click on New. (If making changes to an existing account, double click it on the list)
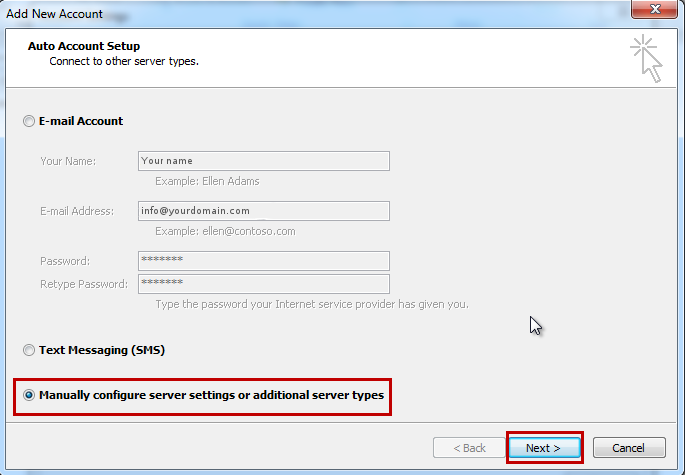
- Select Manually configure server settings or additiona server types and click Next >.
- Select Internet E-mail

- Fill the form
- Your Name: Your name as you want it to appear on your outbound email messages.
- E-mail Address: Your email address.
- Account Type POP3
- Incoming mail server: mail.yourdomain.com
- Outgoing mail server (SMTP): mail.yourdomain.com
- User Name: Your complete email address.
- Password: Your email password.
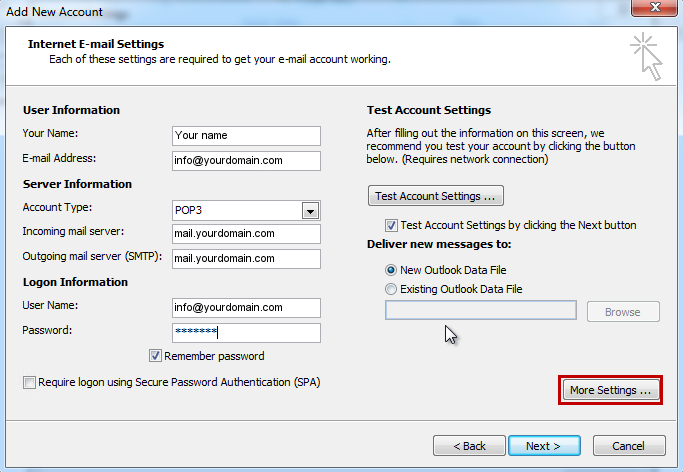
- Click on More Settings …
- Select the Outgoing Server tab and tick My outgoing mail sever (SMTP) requires authentication and Use same settings as incoming mail server.

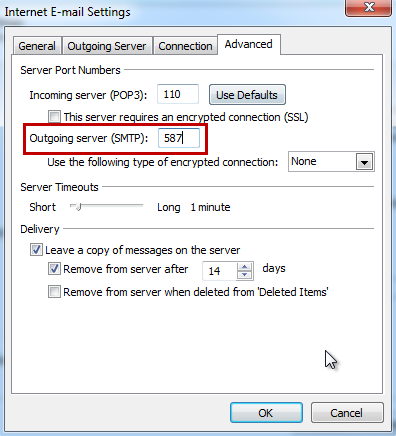
- Select the Advanced tab and type the following information
- Incoming server (POP3): 110
- Outgoing server (SMTP): 587 (If 587 doesn’t work, try 25 or 465)
- Click OK, then Next, then Finish.